

Easy Homemade Hummus
A staple in my kitchen is hummus. I like to slather it on toast, dip veggies in it, or drop a big dollop on my salad for lunch. Sometimes I use it as a condiment on veggie burgers, or wrap it up in a flatbread with fresh veggies. Although I sometimes buy hummus at the grocery store, I also make it at home quite a lot- it’s a regular part of my meal prep routine. And this may sound like bragging (haha, well yes, it is), I’ve worked hard to perfect my hummus recipe, which I’m sharing with you here.
Why make your own hummus?
There’s many reasons to try making your own hummus. Here are just a few…
#1. Homemade hummus tastes better
I find store-bought hummus usually has a strong acidic taste, often due to the addition of citric acid- a food preservative. But my homemade hummus? Rich and creamy. I add only as much lemon juice as I wish, to lend a fresh, zippy taste. Along the same lines, you have full control over the amount of garlic and other spices that go into your hummus, and the quality of the ingredients you use, including olive oil. Store bought hummus? It’s almost always made with low-grade inflammatory canola or soybean oil, which you generally want to avoid.
#2. Homemade hummus is more economical than store bought
Like most things, making your own is easier on the wallet, especially if you’re eating it regularly. And if you cook your own chickpeas, rather than buying them canned, it’s even cheaper (and will have a better texture and taste).
#3. You control the fat content
If you are looking to lower your fat consumption, you can completely omit the olive oil and instead add a bit more of the bean cooking water to reach the right consistency. In fact, especially if you cook your beans from scratch, the leftover cooking water, called aquafaba, will lend both a richer flavor and creaminess to your hummus.
#4. Making your own hummus is easy-Peasy
All you need are a few basic ingredients and a mediocre food processor or blender. Seriously! Just one tip: if you cook your own chickpeas from scratch, the hummus will taste better!
One more thing…
#5. I have a technique to make your hummus extra creamy
If you’ve got a super powerful food processor, this won’t matter so much. I’ve use a Vitamix blender with food processor attachment and it works miracles, but for years I relied on a very basic food processor. And if that’s what you’ve got at home, my blending technique will be gold.
The key is to add ingredients in the right order. You want the flavors to marry nicely and evenly throughout the hummus, and for the consistency to be smooth and creamy. To do that, first blend together the garlic, lemon juice, tahini, salt and oil. Then, add the chickpeas gradually, in batches, so that everything blends together evenly. And if you still can’t get a smooth consistency, add a little cooking water to smooth it all out. And voilá! Enjoy, folks!
Here’s the recipe.

Easy Homemade Hummus
Makes about 2 cups of hummus
Ingredients
1 1/2 cups chickpeas - 1 can OR make them yourself from scratch
1 clove of garlic
Juice of 1 lemon (about 3 tablespoons)
1/4 to 1/2 teaspoon salt
1-2 tablespoons extra virgin olive oil (optional but recommended)
1/3 cup tahini
Leftover cooking water
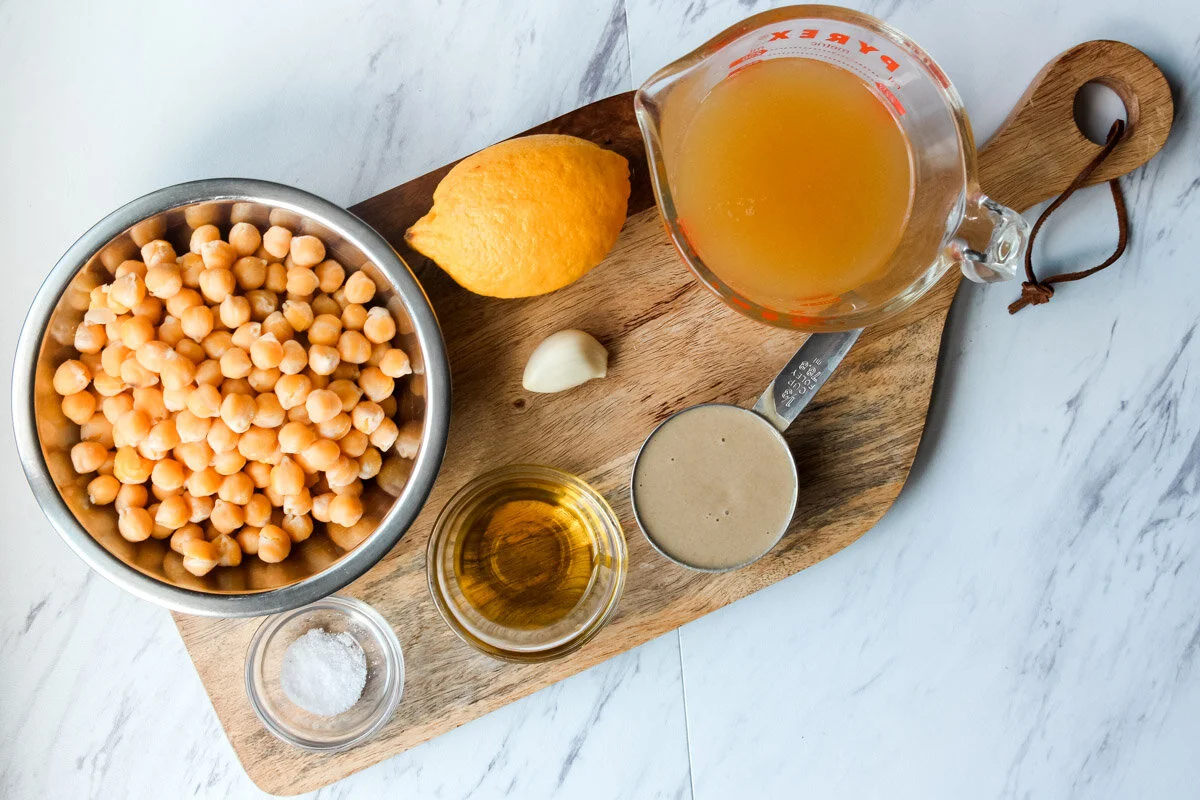
Mise en place: set up your hummus ingredients first so everything’s ready for you.
Directions
Cook or heat the chickpeas. If you’re making them from scratch, when they are done, measure out 1 1/2 cups of chickpeas and save the cooking liquid. If you’re using a can of chickpeas, drain them, place them in a small pot and add water until they’re just covered. Then heat the chickpeas on the stovetop and let them simmer around five minutes. Drain them and save that cooking liquid. Why? The hummus will blend together more easily if your beans are warm. And depending on how powerful your blender/food processor is and whether you’re using oil, we might use some of the cooking water at the end of the blending process.
Place the garlic into the bowl of your food processor or blender and chop until it’s minced. You might need to scrape down the sides of your blender or food processor bowl a couple of times.
Add the lemon juice and blend some more. We want to get that garlic and finely blended into the hummus as possible.
Add the salt and pulse a couple times to blend. *Note: if your chickpeas were canned in a salty liquid or if you cooked them with salt, use only 1/4 teaspoon here.
Add 1-2 tablespoons of olive oil; how much you use is personal preference and will impact the resulting flavor of your hummus as well as the texture. Pulse a few times.
Now add the tahini and blend the mixture together till it’s fully combined.
We can start adding the chickpeas now, a handful at a time, blending as completely as possible as we go, till you’ve added them all in.
If you’re having trouble reaching a smooth and creamy consistency, add in some of the bean cooking water, 1 tablespoon at a time, till your hummus is the consistency and thickness that you like.
Tips
Finishing off your hummus
If you’d like, leave about a quarter cup of the chickpeas out and incorporate them loosely at the end, with just pulse of your food processor, to give your hummus a little bit of texture.
When I serve hummus (even just to myself), I like to garnish it with some smoked paprika and even a little drizzle of a good quality olive oil.
recipe variations
If you’ve got more than one can of chickpeas or are making a big batch from scratch, you can easily double this recipe.
Many hummus recipes use cumin. If you’d like, add 1/4 teaspoon of cumin when you add the salt.
For a no-oil hummus, leave out the olive oil and follow the recipe as written. At the last step you’ll likely need to add a few tablespoons of cooking water to get the hummus to blend together well.
For a super garlicky hummus, I caution against adding an extra garlic clove- raw garlic can quickly overpower this dish. Instead, roast a head of garlic, and stir in some minced roasted garlic at the very end.
